Preparing the Brownie Bites
Now that you have your ingredients and tools ready, let’s jump into the step-by-step guide to making brownie bites. It’s simple, but a few key tips can make all the difference.
Step 1: Preheat Your Oven
Preheat your oven to 350°F (180°C). This ensures an even baking temperature for your brownie bites. If the oven isn’t hot enough, they won’t cook properly.
Step 2: Mix the Wet Ingredients
Melt the butter and add the sugar. Whisk until the mixture is smooth. This forms the base for your brownie bites. Add the eggs and vanilla extract, and continue whisking until well mixed.
Step 3: Add the Dry Ingredients
In a separate basin, mix the flour, cocoa powder, and salt. Gently fold these dry ingredients into the wet mixture with a spatula. Be careful not to overmix, or your brownie bites could turn out tough.
Step 4: Fill the Mini Muffin Pan
Using a spoon or cookie scoop, divide the batter evenly among the cups in your mini muffin pan. Fill each cup about three-quarters full to give the brownie bites room to rise without overflowing.
With these steps complete, you’re ready to bake. Follow these simple instructions to get perfect brownie bites every time.
Baking Tips for Brownie Bites
Now that your mini muffin pan is filled with brownie batter, it’s time to bake. Here are some helpful tips to ensure your brownie bites come out just right:
- Bake Time: Bake your brownie bites for 15-20 minutes. The exact time depends on your oven and the size of your mini muffin cups. Keep an eye on them, and start checking with a toothpick at around 15 minutes.
- Checking Doneness: Insert a toothpick into the center of a brownie bite. If it comes out with a few moist crumbs, they’re done. If it’s wet with batter, they need more time.
- Cooling: Once baked, let your brownie bites cool in the pan for a few minutes. This helps them set and makes it easier to remove them without breaking.
- Removing from the Pan: After they’ve cooled a bit, run a butter knife around the edges to loosen them. If you use parchment paper or liners, this step is much easier.
With these tips, you’ll achieve the perfect balance of fudgy centers and slightly crisp edges. Now, let’s explore some creative topping ideas to elevate your brownie bites.
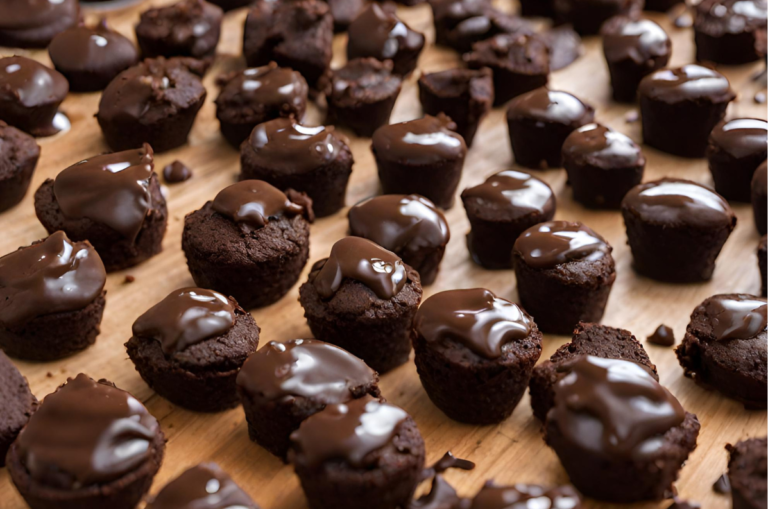
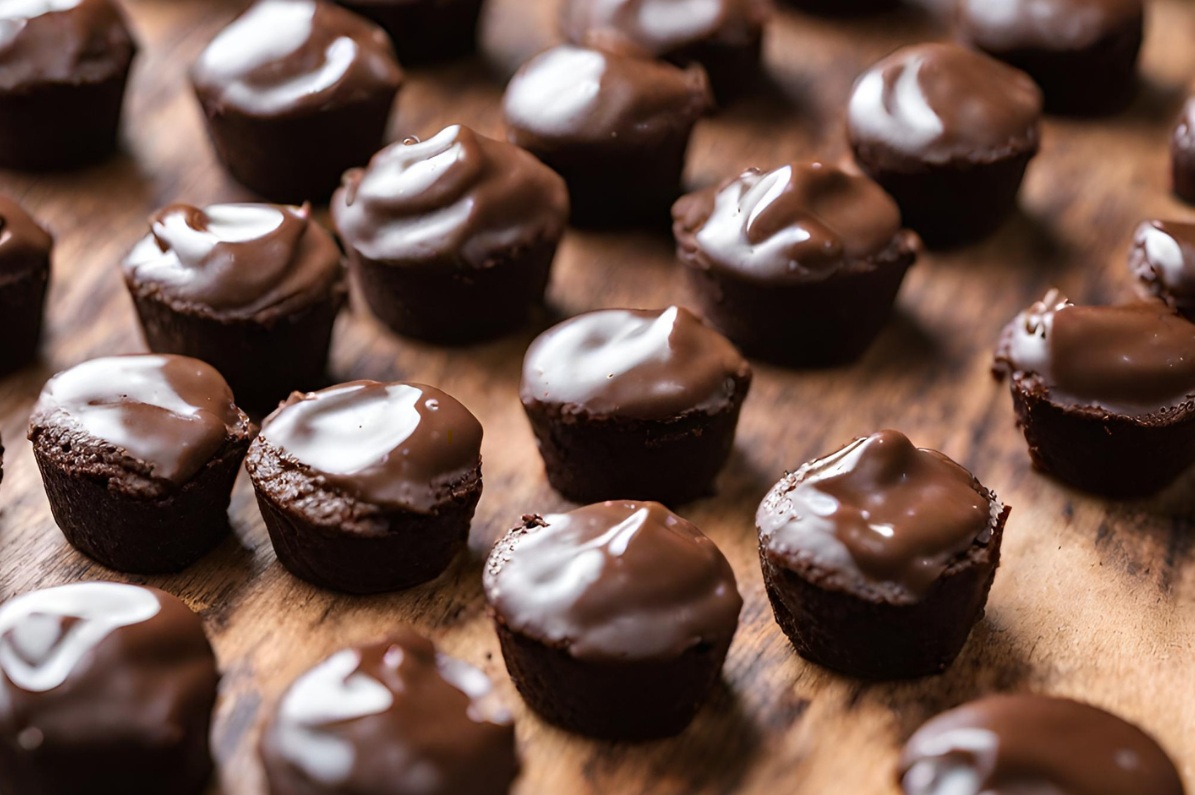
Creative Topping Ideas for Brownie Bites
Once your brownie bites recipe has cooled, it’s time to get creative with toppings. Adding fun toppings not only makes them look more appealing but also adds an extra layer of flavor. Here are some suggestions to get you started:
- Chocolate Ganache: Melt some chocolate chips with cream to make a rich ganache. Drizzle it over the brownie bites for a decadent touch.
- Frosting: Pipe on your favorite frosting, like vanilla or chocolate buttercream, to turn these bites into mini cupcakes. Top with sprinkles for extra fun.
- Nuts: Crushed walnuts or pecans add a delightful crunch and a hint of nuttiness. Sprinkle them over the brownie bites for a tasty finish.
- Mini Marshmallows: Top your brownie bites with mini marshmallows, then broil for a few seconds to get that golden-brown effect.
- Caramel Drizzle: Warm some caramel sauce and drizzle it over the bites for a sweet, sticky topping.
With these creative topping ideas, your brownie bites will be the hit of any party or gathering. Now, let’s explore how to store and freeze them for later enjoyment.
Storing and Freezing Brownie Bites
If you’re lucky enough to have leftover brownie bites, you’ll want to store them properly to keep them fresh. Let’s talk about the best ways to store and freeze them for longer-lasting enjoyment.
Storing Brownie Bites
To store brownie bites, place them in an airtight container at room temperature. This keeps them from drying out. If you’ve added any toppings, like frosting or ganache, make sure they’re fully set before storing. Your brownie bites should stay fresh for about 4 days if stored properly.
Freezing Brownie Bites
If you want to keep your brownie bites for longer, freezing is a great option. Here’s how to do it:
- Flash Freeze: Place your cooled brownie bites on a baking sheet and put them in the freezer for about an hour. This keeps them from sticking together when stored.
- Store in Freezer Bags: Once they’re frozen, transfer the bites to a freezer-safe bag. Remove as much air as possible before sealing.
- Label and Store: Label the bag with the date, and store it in the freezer. Your brownie bites can stay good for up to 2 months.
When you’re ready to enjoy them, simply take out as many as you need and let them thaw at room temperature. If you want them warm, you can pop them in the microwave for a few seconds, and they’re good to go.
With these storage and freezing tips, you’ll always have brownie bites ready for a quick snack or dessert. Next, let’s explore some exciting variations and additions to the classic brownie bites recipe</em>.
Different Versions of Brownie Bites
If you love experimenting with your brownie bites, there are plenty of ways to customize them. These variations allow you to add a unique twist, whether it’s different flavors, fillings, or toppings. Here are some ideas to spark your creativity:
Adding Extra Ingredients
Consider incorporating extra ingredients into the brownie batter before baking. Crushed nuts, like walnuts or pecans, add a satisfying crunch and nutty flavor. You can also mix in chocolate chips for an extra dose of chocolatey goodness.
Filling with Caramel or Nutella
For a sweet surprise, try filling your brownie bites with caramel or Nutella. Spoon a small amount into the center of each batter-filled muffin cup before baking. This creates a gooey filling that takes your bites to the next level.
Topping with Oreos or Marshmallows
Before baking, press an Oreo into each muffin cup for a cookie-filled treat. Alternatively, add mini marshmallows on top and let them melt during baking for a s’mores-inspired brownie bite.
Red Velvet Brownie Bites
For a colorful twist, try making red velvet brownie bites. Add a few drops of red food coloring to the batter, and use cream cheese frosting as a topping. This version is perfect for festive occasions or when you want something a bit different.
With these variations, your brownie bites will always be unique and full of flavor. Now, let’s move on to some frequently asked questions about brownie bites, covering everything from storage to baking techniques.
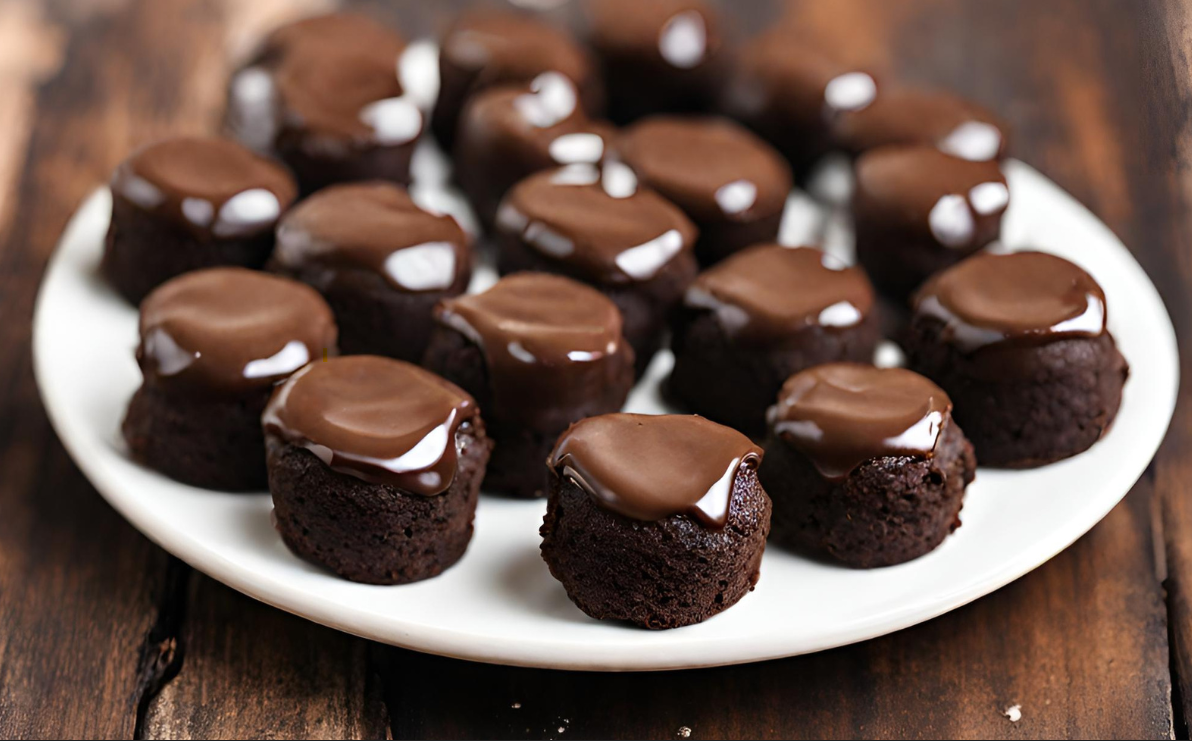
Final Thoughts on Brownie Bites
After exploring all the wonderful ways to make and customize brownie bites, it’s clear that these mini treats are a versatile and delicious addition to any dessert spread. Their small size makes them perfect for snacking, parties, or even gifting to friends and family. With a simple base recipe and a variety of toppings and fillings, you can create an endless array of brownie bites</em> to suit any occasion.
Whether you prefer classic fudgy brownies, red velvet twists, or s’mores-inspired bites, there’s a version for everyone. The ability to freeze and store them for later makes them a convenient option for those who love to have sweet treats on hand. And with so many creative topping ideas, you can turn your brownie bites into delightful, eye-catching desserts that are sure to impress.
As you try out different recipes and variations, don’t hesitate to experiment with new flavors and ingredients. The beauty of brownie bites is that they’re easy to make and even easier to enjoy. So, grab your mini muffin pan and start baking—your taste buds will thank you!
Tips for Perfect Brownie Bites Every Time
To ensure your brownie bites turn out perfectly every time, it’s essential to follow some best practices. These tips will help you avoid common pitfalls and elevate your brownie game:
Don’t Overmix the Batter
When combining wet and dry ingredients, it’s crucial not to overmix. This can lead to tough brownies instead of the soft, fudgy texture you desire. Mix just until the flour is incorporated and there are no visible streaks.
Use Room Temperature Ingredients
For even mixing and a smoother batter, use room-temperature ingredients like butter and eggs. This ensures that everything combines seamlessly without lumps or clumps.
Grease or Line Your Mini Muffin Pan
To prevent sticking, make sure to grease your mini muffin pan or use parchment paper liners. This simple step makes removing the brownie bites a breeze and keeps them from breaking apart when you take them out of the pan.
Avoid Overbaking
Overbaking can dry out your brownie bites, so keep an eye on the oven. Check for doneness by inserting a toothpick into the center. If it comes out with a few moist crumbs, you’re good to go. If it’s still wet with batter, give it a few more minutes.
With these tips, you can ensure that every batch of brownie bites is a success. Whether you’re baking for a party or a quick snack, these simple tricks will help you achieve the perfect fudgy texture and delightful flavor. Now, you’re ready to start baking and enjoy your brownie bites!
Frequently Asked Questions About Brownie Bites
When it comes to brownie bites, people often have questions about baking, storing, and customizing them. Here are some frequently asked questions to help you get the most out of your brownie bites recipe</em>:
Can I freeze brownie bites?
Yes, you can freeze brownie bites! To freeze, let them cool completely, then place them on a baking sheet in the freezer for an hour or two to flash freeze. After that, transfer them to a freezer-safe bag. This way, they won’t stick together. Brownie bites can be frozen for up to 2 months.
What else can I add to the batter?
To customize your brownie bites, try adding crushed nuts, chopped caramel candies, or even broken cookies. If you’re feeling adventurous, you can add a swirl of peanut butter or Nutella for an extra burst of flavor.
Can I use a regular muffin tin?
Yes, you can use a regular muffin tin but remember to increase the cooking time by 5-7 minutes. Because they’re larger, they need more time to cook through. Check for doneness with a toothpick to ensure they don’t overcook.
How do I keep brownie bites from sticking?
To avoid sticking, use a non-stick mini muffin pan or line it with parchment paper or cupcake liners. Spraying the pan with baking spray that contains flour can also help prevent sticking.
Can I make brownie bites gluten-free?
Yes, you can make gluten-free brownie bites by substituting the all-purpose flour with gluten-free flour. Simply ensure that all other components are gluten-free.
With these FAQs, you have all the information you need to make the perfect brownie bites. Finally, let’s wrap up with some concluding thoughts on these delicious mini-treats.