
Butter cake, a classic favorite known for its rich, buttery flavor and soft, moist crumb, is more than just a delicious treat—it’s a versatile dessert that can be adapted to fit any occasion. In this comprehensive guide, we’ll explore every aspect of how to prepare butter cake, from selecting the right ingredients to mastering the baking process and beyond. Whether you’re a beginner baker or looking to perfect your technique, this article will provide you with all the tips and tricks you need to bake the perfect butter cake.
Introduction to How to Prepare Butter Cake
Butter cake, with its rich flavor and moist texture, is a beloved classic in many households. This section will help you understand why this cake holds such a special place in the hearts of dessert lovers.
Overview of Preparing Butter Cake
Butter cake is not just a treat; it’s a versatile base that can be adapted for many occasions. Its simple yet delightful flavor comes from quality ingredients that blend together to form a soft, tender crumb.
Reasons to Master Butter Cake Preparation
Choosing to make a butter cake is like choosing to learn a classic dance. It provides a foundation on which many other complex recipes are built. Whether it’s a birthday celebration or a cozy evening snack, butter cake never disappoints. Its straightforward recipe and the joy it brings make it a staple in the baking world.
In the following sections, we’ll delve into the specifics of what makes a great butter cake, from the right mix of ingredients to the magic of the baking process. Stay tuned as we unfold the layers of creating this timeless dessert.
Essential Ingredients and Equipment for Butter Cake
The secret to a flawless butter cake lies in the precision of its ingredients and the tools used to bring them together. Let’s break down what you’ll need to start your baking adventure.
Complete Ingredients List for Butter Cake
A superb butter cake starts with, you guessed it, butter! Ensure it’s of high quality for that melt-in-your-mouth goodness. You’ll also need granulated sugar, eggs, all-purpose flour, baking powder, and milk. Each component plays a crucial role in creating the cake’s structure and flavor.
Must-Have Equipment for Baking Butter Cake
The right tools make the baking process smoother and more enjoyable. At a minimum, you’ll need a sturdy mixer, mixing bowls, measuring cups and spoons, a baking pan, and parchment paper. A mixer is essential for creaming the butter and sugar to the perfect consistency, which is key for a light and airy cake.
By gathering these ingredients and tools, you’re setting yourself up for success. Next, we’ll dive into the mixing and baking processes, where the magic really happens. Keep your apron ready and your enthusiasm high as we move on to the heart of butter cake baking!
Detailed Guide to Baking Butter Cake
Now that you have all your ingredients and equipment ready, it’s time to dive into the baking process. This step-by-step guide will walk you through creating a butter cake that’s perfectly moist and fluffy.
Step-by-Step Preparation for Butter Cake
- Starting Off Right: Begin by preheating your oven to the recommended temperature—usually around 350°F (175°C). This ensures the oven is hot enough when the batter is ready, providing the perfect environment for your cake to rise.
- Mixing the Batter: In your mixing bowl, cream the butter and sugar until light and fluffy. This introduces air into the batter, helping the cake to rise during baking. Next, beat in the eggs one at a time, ensuring each is fully incorporated before adding the next.
- Combining Dry Ingredients: In a separate bowl, sift together the flour and baking powder. This not only removes lumps but also aerates the flour, making for a lighter cake.
- Bringing It All Together: Add the dry ingredients to your butter mixture alternately with milk, starting and ending with the flour. This method helps maintain the air you’ve beaten into the batter and prevents the mixture from curdling.
- Ready to Bake: Pour the batter into your prepared pan, smoothing the top with a spatula. Bake in the preheated oven until a toothpick inserted into the center comes out clean, indicating that your cake is perfectly baked.
- Cooling Down: Let the cake cool in the pan for a few minutes before transferring it to a wire rack. This helps it set and makes it easier to remove from the pan without breaking.
Following these steps carefully will help you achieve a deliciously soft and perfectly baked butter cake. Next, we’ll explore some delightful variations to customize your cake, adding flavors and personal touches to suit any occasion.
Variations and Customizations
Now that you’ve mastered the classic butter cake, why not spice things up? This section will guide you through various tweaks and flavors you can introduce to make your butter cake uniquely yours.
Flavor Variations
- Citrus Zest: Adding lemon, orange, or lime zest to your batter can infuse a refreshing citrusy kick, perfect for summer gatherings.
- Extracts and Essences: Swap out vanilla for almond, coconut, or even rum extract to match the cake to your dessert theme or personal taste preferences.
- Spices: For a warm, autumnal flavor, mix in spices such as cinnamon, nutmeg, or cardamom into the flour before combining it with the wet ingredients.
These simple yet effective modifications can dramatically change the flavor profile of your cake, making it adaptable to various tastes and occasions.
Dietary Modifications
- Gluten-Free: Substitute the all-purpose flour with a gluten-free blend that includes xanthan gum, which helps replicate the texture of traditional cakes.
- Dairy-Free: Use plant-based milk and dairy-free butter alternatives. These substitutions work seamlessly and ensure everyone can enjoy your delicious creation, regardless of dietary restrictions.
By exploring these variations, your butter cake will never be plain or boring. Next, we’ll move on to the artistic side of cake baking—decoration and presentation, where you can truly let your creativity shine.
Variations and Customizations
Now that you’ve mastered the classic butter cake, why not spice things up? This section will guide you through various tweaks and flavors you can introduce to make your butter cake uniquely yours.
Flavor Variations
- Citrus Zest: Adding lemon, orange, or lime zest to your batter can infuse a refreshing citrusy kick, perfect for summer gatherings.
- Extracts and Essences: Swap out vanilla for almond, coconut, or even rum extract to match the cake to your dessert theme or personal taste preferences.
- Spices: For a warm, autumnal flavor, mix in spices such as cinnamon, nutmeg, or cardamom into the flour before combining it with the wet ingredients.
These simple yet effective modifications can dramatically change the flavor profile of your cake, making it adaptable to various tastes and occasions.
Dietary Modifications
- Gluten-Free: Substitute the all-purpose flour with a gluten-free blend that includes xanthan gum, which helps replicate the texture of traditional cakes2. Dairy-Free: Use plant-based milk and dairy-free butter alternatives. These substitutions work seamlessly and ensure everyone can enjoy your delicious creation, regardless of dietary restrictions.
By exploring these variations, your butter cake will never be plain or boring. Next, we’ll move on to the artistic side of cake baking—decoration and presentation, where you can truly let your creativity shine.
Decoration and Presentation
The final flourish on your butter cake involves its decoration and presentation, which can transform a simple cake into a showstopper. Here are some creative ideas to elevate your cake’s appearance and make it truly special.
Decorating Tips
- Buttercream Frosting: A silky smooth buttercream is not only traditional but offers a canvas for coloring and flavoring. Pipe it on or smooth it out with a spatula for a sleek look.
- Fondant Accents: For those special occasions, roll out fondant to create shapes, letters, or even intricate designs that rest on top of your cake.
- Edible Decorations: Sprinkle on edible glitter, colored sugar, or even fresh flowers to add texture and vibrant colors to your cake.
These decorating techniques allow for personal expression and can be tailored to fit any event theme or personal taste.
Presentation Styles
- Tiered Stacking: For larger gatherings, consider stacking multiple layers of butter cake, each separated by a layer of frosting or fruit compote for an impressive tiered effect.
- Individual Serves: Slice the cake and plate individually with a dollop of cream or a drizzle of flavored syrup for a personalized touch at dinner parties.
- Thematic Display: Match your cake’s presentation style to the event theme—use specific colors or toppings that complement the overall décor of your gathering.
A well-decorated and thoughtfully presented butter cake not only delights the eyes but also enhances the overall dining experience. As we move forward, we’ll explore the best practices for storing and preserving your butter cake to ensure it remains as enjoyable as the day it was baked.Beyond the Bake: Sharing and Serving Butter Cake
After the delightful process of baking and perhaps an even more satisfying decorating session, what comes next is arguably the best part—sharing your butter cake. This section provides tips on how to serve and share your cake to enhance the experience for everyone involved.
Serving Suggestions
- Pairing with Beverages: Butter cake goes beautifully with a range of beverages. For a morning treat, serve it with a cup of hot coffee or tea. If it’s for an afternoon snack, a glass of cold milk complements it perfectly.
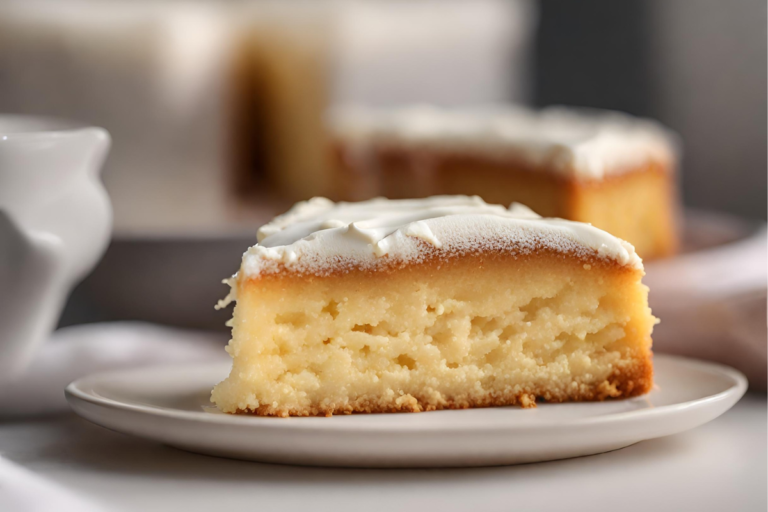
- Plating Techniques: To elevate your presentation, serve each slice on a plate with a dusting of powdered sugar, a dollop of whipped cream, or a drizzle of fruit syrup. These small additions not only add flavor but also make the cake visually more appealing.
- Seasonal Adaptations: Match your serving style to the season. For instance, add fresh berries in the summer or warm spices in the winter to your garnishes to tie the flavors to the time of year.
Sharing Your Creations
- Hosting a Cake Tasting: Invite friends or family over for a cake tasting event where you can showcase your baking skills. Provide different butter cake variations to sample, which can be a fun and engaging way to enjoy the fruits of your baking labor.
- Packaging for Gifts: Butter cake makes a thoughtful gift. Wrap slices or whole cakes in decorative paper or boxes. Include a card with a note or the recipe, offering a personal touch that makes the gift even more special.
- Contributing to Community Events: Bring your butter cake to community gatherings, potlucks, or charity events. It’s a great way to connect with others and share the joy that a good cake can bring.