

Red Velvet Brownies Recipe: A Fudgy Dessert Delight
Red velvet brownies are the ultimate treat—fudgy, vibrant, and downright delicious. They combine the richness of traditional brownies with the unique flavor of red velvet. This article dives deep into the red velvet brownies recipe, covering everything from the essential ingredients to step-by-step instructions, expert tips, and even FAQs. Ready to indulge? Let’s get started.
What are the Red Velvet Brownies Recipe?
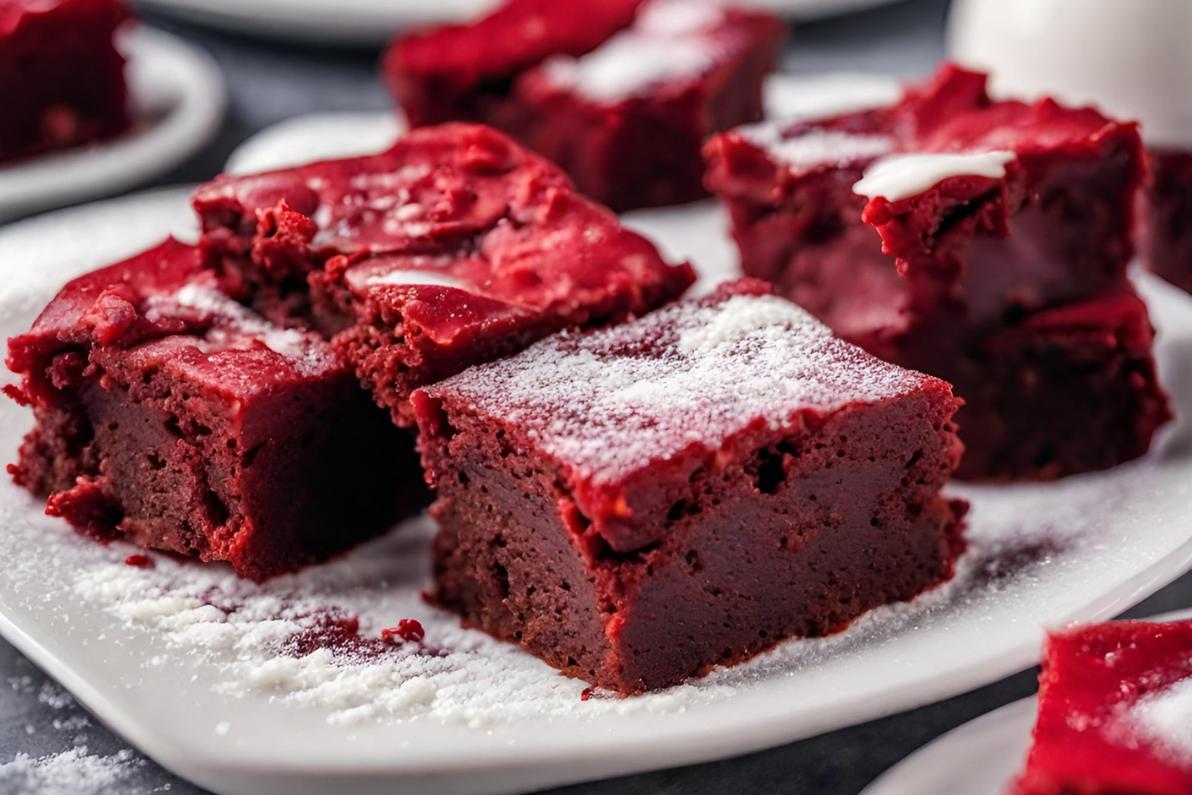
Red velvet brownies are a unique twist on classic brownies. Unlike regular brownies, they have a deep red color and a subtle chocolate flavor, thanks to the cocoa powder and red food coloring. The texture is chewy, with a perfect balance between fudgy and cakey.
What’s really cool about these brownies is how versatile they are. You can serve them plain, dusted with powdered sugar, or topped with cream cheese frosting. They’re ideal for Valentine’s Day, Christmas, or any special occasion where you want a pop of color on your dessert table.
One of the reasons red velvet brownies are so popular is because they’re not overly sweet. The combination of chocolate and cream cheese creates a unique taste that’s both indulgent and refreshing. These brownies are perfect for anyone who loves a touch of luxury in their dessert but doesn’t want anything too overpowering.
To make red velvet brownies, you need a few key ingredients: butter, sugar, cocoa powder, eggs, flour, and, of course, red food coloring. But before we dive into the detailed recipe, let’s talk about the equipment you’ll need and the steps to create this delectable treat.
Essential Ingredients and Equipment for Red Velvet Brownies
To make the best red velvet brownies, you need the right ingredients and equipment. The core ingredients create that rich, fudgy texture with a vibrant red color. These are the necessities to get you going.
Ingredients for Red Velvet Brownies
The key ingredients are simple but effective:
- Butter: Adds richness and moisture. Use unsalted butter for more control over the flavor.
- Sugar: A combination of granulated and brown sugar gives these brownies a sweet base.
- Cocoa Powder: Provides a subtle chocolate flavor. Use Dutch-processed cocoa for deeper taste.
- Red Food Coloring: This is what gives red velvet brownies their distinctive color.
- Eggs: They add structure and moisture to the brownies.
- Flour: All-purpose flour works best for this recipe.
- Salt: Just a pinch to enhance the flavor and balance the sweetness.
You can also add extras like chocolate chips for more indulgence or M&Ms for a fun twist.
Equipment for Red Velvet Brownies
Having the right equipment makes the process smoother. Here’s what you’ll need:
- Baking Pan: An 8×8 inch or 9×9 inch pan works well for these brownies.
- Mixing Bowls: At least two, one for wet ingredients and one for dry.
- Spatulas: A rubber spatula helps with mixing without knocking out too much air.
- Whisk or Hand Mixer: To beat the eggs and sugar until light and fluffy.
- Oven Thermometer: Ensures your oven is at the correct temperature for baking.
With these ingredients and equipment, you’re ready to make your own batch of red velvet brownies. Let’s move on to the step-by-step instructions to bring it all together.
Step-by-Step Instructions for Red Velvet Brownies
Creating red velvet brownies is a straightforward process. Follow these steps for a batch of delicious, fudgy brownies with that vibrant red color.
Preheat the Oven
First, preheat your oven to 350°F (177°C). This ensures that the brownies bake evenly. Line an 8×8-inch baking pan with parchment paper or aluminum foil, leaving some overhang for easy removal. Lightly spray with nonstick cooking spray.
Mix the Batter
Beat sugar and softened butter together in a large mixing bowl until frothy and light. This usually takes about 2-3 minutes with a hand mixer. Add in red food coloring and mix until well combined. Then, add cocoa powder and beat again until fully incorporated.
Crack the eggs into the mixture one at a time, beating after each addition. This helps create a smooth, creamy batter. Add in vanilla extract to enhance the flavor.
Mix the salt and all-purpose flour in another basin. Stirring until just mixed, gradually add the dry mixture to the wet ingredients. Avoid overmixing the brownies as this could lead to cakey brownies instead of fudgy ones.
Bake the Brownies
Pour the batter into the baking pan and distribute it evenly with a spatula. To expel air bubbles, gently tap the pan on the counter. Bake for 30-35 minutes, or until a toothpick inserted into the center comes out with just crumbs and no moist batter.
Cool and Cut
Let the brownies cool completely in the pan. This can take an hour or more, but it’s crucial for the brownies to set properly. Once cooled, lift the parchment or foil to remove the brownies from the pan. Cut into squares, and you’re ready to serve.
These step-by-step instructions will help you create the perfect red velvet brownies. Next, let’s talk about adding cream cheese frosting for an extra layer of decadence.
Adding Cream Cheese Frosting to Red Velvet Brownies
If you’re looking to elevate your red velvet brownies, cream cheese frosting is the way to go. This rich, tangy topping complements the fudgy brownies perfectly, adding a layer of decadence that’s hard to resist.
Making the Cream Cheese Frosting
To make the cream cheese frosting, you’ll need softened cream cheese and butter, powdered sugar, and vanilla extract. Cream cheese that has softened and butter should be smoothed out with a hand mixer. Gradually add powdered sugar, beating until the mixture is light and fluffy. Add a splash of vanilla extract for extra flavor.
The key to great cream cheese frosting is to get the consistency just right—not too thick, but not runny. You can thin it out if it is too thick by adding a small amount of milk or cream. If it’s too thin, add more powdered sugar.
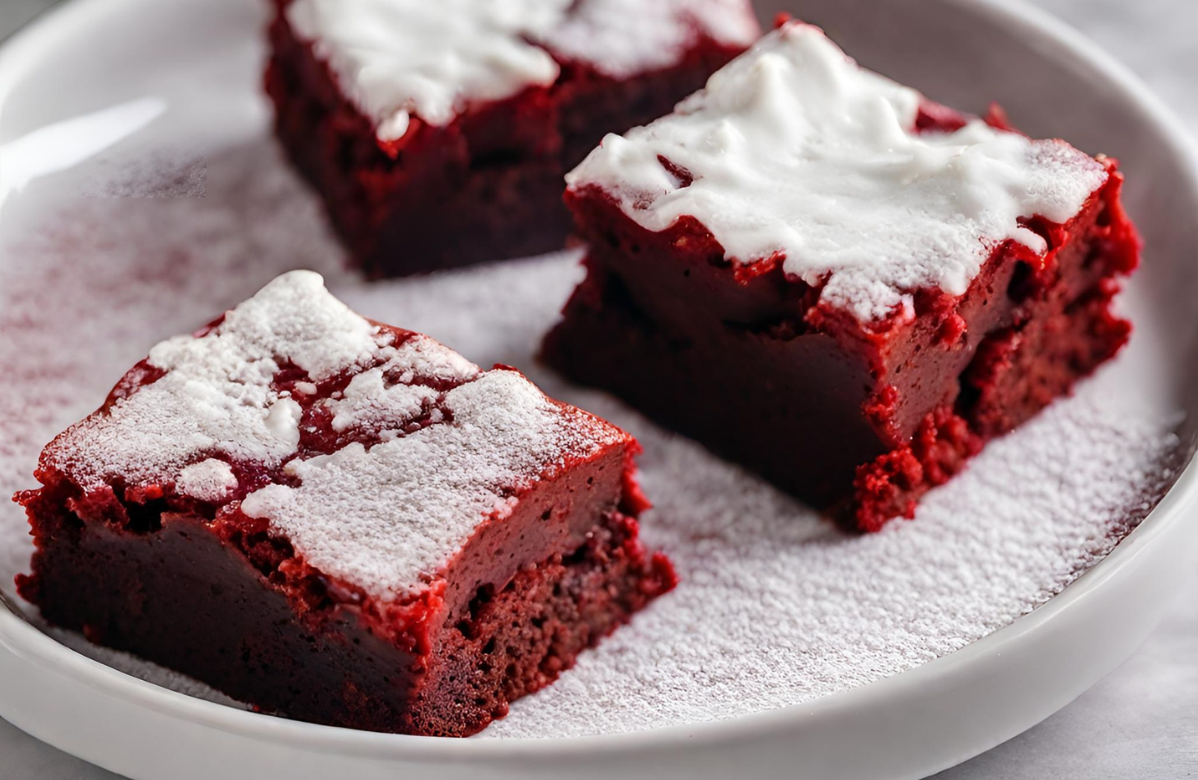
Applying the Frosting
Once your brownies are completely cool, spread the cream cheese frosting evenly over the top. Use a spatula or a butter knife to create a smooth, even layer. If you want a thicker layer of frosting, simply double the recipe or add extra powdered sugar for a more decadent topping.
Once the frosting is on, you can add decorations like sprinkles, chocolate shavings, or a dusting of cocoa powder to give your brownies a festive touch.
Cream cheese frosting turns these red velvet brownies into a delightful dessert that’s perfect for any occasion. Next, let’s explore how to store your brownies to keep them fresh and delicious.
Storing and Freezing Red Velvet Brownies
Storing and freezing red velvet brownies properly is key to maintaining their freshness and texture. Whether you plan to enjoy them over several days or save some for later, these tips will help you keep them at their best.
Storing Red Velvet Brownies
If your brownies are not frozen, you can store them at room temperature. A metal tin works best because it helps keep the original texture of your brownies without turning them soggy, which can happen with plastic containers. You can store them in a metal tin for up to three days.
If your brownies have cream cheese frosting, it’s best to store them in the refrigerator. If the cream cheese frosting is kept too long at room temperature, it may go bad. When stored in the fridge, these brownies can last for up to six days.
Freezing Red Velvet Brownies
Red velvet brownies freeze well, making them a great make-ahead dessert. To freeze, wrap them tightly in freezer-safe plastic wrap or foil. For extra protection, you can place the wrapped brownies in a freezer bag to prevent freezer burn. You can freeze brownies whole or cut them into individual portions for easy snacking later.
When you’re ready to enjoy your frozen brownies, let them thaw in the refrigerator overnight. This will ensure they retain their fudgy texture. After thawing, you can leave them at room temperature for a few minutes to bring them to the perfect eating temperature.
With these storage and freezing tips, you can keep your red velvet brownies fresh and delicious, whether you plan to eat them in a few days or a few weeks. Next, let’s explore some expert tips and tricks to ensure your brownies turn out perfectly every time.
Expert Tips and Tricks for Perfect Red Velvet Brownies Recipe
Making red velvet brownies that turn out fudgy and vibrant isn’t complicated, but a few expert tips can make the process easier. From baking techniques to troubleshooting, here are some tricks to ensure your brownies come out perfectly every time.
Baking Techniques for Red Velvet Brownies Recipe
One key to successful brownies is accurate measurements. Weigh your ingredients with a digital scale for the best results. It’s more precise than using measuring cups and ensures your brownies have the right texture. Additionally, use a digital oven thermometer to confirm your oven is at the correct temperature before baking. An oven that’s too hot or too cold can affect the outcome.
When baking, it’s better to underbake than overbake. Brownies continue to set as they cool, so a slightly underbaked brownie will firm up to the perfect fudginess. Check the brownies with a toothpick—if it comes out with a few crumbs but not raw batter, you’re on the right track.
Troubleshooting Red Velvet Brownies Recipe
If your brownies come out too dry, it’s likely they were overbaked or had too much flour. To fix this, adjust your baking time and double-check your ingredient measurements. On the other hand, if they’re too gooey, you might need to bake them a little longer. Give them more time in the oven, checking frequently until they’re just right.
Variations and Swaps
Red velvet brownies are versatile. You can make gluten-free brownies by using gluten-free flour, though the results may vary. You can also add fun twists like chocolate chips, sprinkles, or other candies to give them a unique touch.
These expert tips and tricks will help you create the best red velvet brownies. In the final part, let’s address some frequently asked questions about these delightful desserts.
Red Velvet Brownies Recipe for Special Occasions and Serving Ideas
Red velvet brownies aren’t just a delicious dessert; they’re perfect for special occasions. The vibrant red color and fudgy texture make them a great choice for Valentine’s Day, Christmas, birthdays, or any event that calls for a festive treat.
Special Occasions
Red velvet brownies can be customized for various holidays and events:
- Valentine’s Day: Add heart-shaped sprinkles or cut the brownies into heart shapes for a romantic touch.
- Christmas: Top the brownies with red and green sprinkles, or drizzle them with white chocolate for a snowy effect.
- Birthdays: Decorate with colorful candies or personalized toppings to make them extra special.
These brownies can also be a hit at potlucks, office parties, or family gatherings. Their unique color and rich flavor are sure to attract attention.
Serving Ideas
When serving red velvet brownies, consider these suggestions to enhance the experience:
- Serve with Ice Cream: A scoop of vanilla ice cream pairs perfectly with the fudgy texture of the brownies.
- Add Whipped Cream: Top with a dollop of whipped cream for a light, airy contrast to the dense brownies.
- Accompany with Fresh Berries: Strawberries, raspberries, or blueberries complement the brownies’ rich flavor and add a fresh, fruity element.
With these serving ideas and special occasion tips, your red velvet brownies will be a delightful addition to any event or gathering. Enjoy experimenting with decorations and presentations to make them your own.
FAQs About Red Velvet Brownies Recipe
People have questions about red velvet brownies, from their unique red color to the best ways to serve them. Let’s address some of the most common questions to give you more insights into this delightful dessert.
Is Red Velvet Just Chocolate?
No, red velvet isn’t just chocolate. While it does contain cocoa powder, red velvet has a distinct flavor profile that’s a mix of subtle chocolate and a hint of tanginess, often from vinegar or buttermilk. The red color comes from red food coloring, which sets it apart from traditional brownies.
Why Are Red Velvet Brownies Red?
The red color in red velvet brownies comes from food coloring, typically red gel or liquid. Originally, the red hue came from a chemical reaction between cocoa powder and acidic ingredients, but modern recipes use food coloring for consistent results.
How Should Red Velvet Brownies Be Stored?
Red velvet brownies can be stored at room temperature if they don’t have frosting. Use a metal tin to keep them fresh for up to three days. If frosted with cream cheese icing, store them in the refrigerator to prevent spoilage. They can last up to six days in the fridge.
Can You Freeze Red Velvet Brownies Recipe?
Yes, you can freeze red velvet brownies. Wrap them tightly in freezer-safe plastic wrap or foil, and then place them in a freezer bag for extra protection. They can remain frozen for up to two months. Thaw them in the refrigerator overnight before enjoying them.
These FAQs cover some of the most common questions about red velvet brownies. Understanding these points can help you make, store, and enjoy these decadent treats with confidence.